Thursday, March 4, 2010

Spar riveting


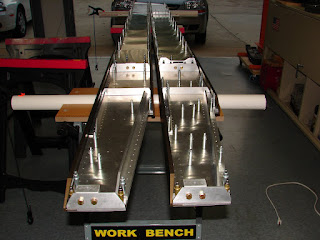
If you want to find out the definition of "Drilling" "Up Drilling" and "De-burring" you may as well build an aluminum airplane. I am not going to bore you with the details, but if you remember the plan picture of about 2 blogs ago, well here I am doing the final assembly of the main spar.
I used a C-Frame to assist me with the solid rivets. In my opinion, this was the easy part of the assembly.

Angle parts


I chose to make all the angle parts, Wing attach blocks, aileron bell cranks etc before tackling the drilling and riveting of the main spar. In this picture you will see some of the parts that will ultimately make up the main spar and wing assembly

Main Spar Plan


Well, I admire those that have done this before. The Main Spar, Rear spar and wing assembly are very intimidating for a builder like me. Not only are there tons of little parts to make but keeping track of who and what goes where requires an extra dose of "Ritalin" It also doesn't help if you suffer from CRS.
I mean look at this Picture of the main spar assembly and tell me its not intimidating

Wednesday, March 3, 2010

Metal part for the main Spar


Well building the control surfaces and the ruddervators was fun, now we will move onto the Main spar assembly. Before we can start with the assembly of the main spar we need to make all the angle assemblies and attach blocks. In this picture you can see I already made one lower angle and the next piece of aluminum is ready to be shaped in a mirror image of the first part.

Both Ruddervators


As this aircraft is a V tail, well actually a Y tail you have two ruddervator in place of a conventional tail, here both ruddervators are skinned and the remaining clecos will be removed much later in the project

Ruddervator skinned


The Porcupine gets rid off its quills and finally gets a new skin

Monday, March 1, 2010

Ruddervator before Riveting


This picture gives you a good look at the Ruddervator before riveting the assembly together. As promised, here are the copper clecos ( temporary rivets) that will be removed one by one as you rivet the assembly together